How to Deploy a JavaScript Application in 2026 and the Complete Guide From localhost to Production That Nobody Writes in One Place
📧 Subscribe to JavaScript Insights
Get the latest JavaScript tutorials, career tips, and industry insights delivered to your inbox weekly.
Every JavaScript developer can run npm run dev. Far fewer can take that same application and put it on the internet where real users access it with real traffic, real HTTPS certificates, and real uptime requirements. I see this gap constantly on jsgurujobs.com. Developers build impressive portfolio projects that run beautifully on localhost and then have no idea how to deploy them. Their GitHub README says "clone the repo and run npm start." That is not deployment. That is a local development instruction.
The deployment knowledge gap is one of the most expensive gaps in a JavaScript developer's skill set. On jsgurujobs.com, 40% of job postings mention deployment-related skills: Docker, CI/CD, AWS, Vercel, or "ability to deploy and maintain production applications." Yet most coding bootcamps, online courses, and even university programs end at the "it works on my machine" stage. The result is thousands of developers who can build features but cannot ship them to actual users on the actual internet.
This guide covers the complete path from localhost to production for JavaScript applications in 2026. Not just "click deploy on Vercel" (though we cover that). The full picture: environment variables, build optimization, hosting options and their costs, DNS configuration, HTTPS setup, CI/CD automation, database migrations, production logging, monitoring, rollbacks, and the decisions you need to make at each step. This is the guide I wish existed when I deployed my first application and spent 6 hours figuring out why my environment variables were undefined in production while everything worked perfectly on localhost.
Why JavaScript Deployment Knowledge Matters for Your Career in 2026
The job market in 2026 increasingly expects full-cycle developers. The era of "I write frontend code and someone else deploys it" is ending at most companies. Startups expect every developer to deploy. Mid-size companies expect senior developers to own deployment pipelines. Even big tech companies expect developers to understand how their code reaches users.
On jsgurujobs.com, roles that mention deployment skills pay 15-20% more than roles that do not. A React developer who can also set up a CI/CD pipeline, configure a CDN, and debug production issues is worth significantly more than one who can only write components. The deployment skill is what transforms a developer from "builds features" to "ships products," and companies pay for the second one.
The developers who understand what separates senior developers from everyone else know that deployment knowledge is a core part of that gap. You cannot be senior if you cannot deploy your own work.
The Build Step and What Actually Happens When You Run npm run build
Before deploying anything, you need to understand what the build step produces. npm run build transforms your development code into production-ready files. The output depends on your framework.
React (Vite) Build Output
npm run build
# Output: dist/
#   index.html (1 file)
#   assets/
#     index-a1b2c3.js (bundled JS, ~150KB gzipped)
#     index-d4e5f6.css (bundled CSS, ~20KB gzipped)
#     logo-g7h8i9.png (static assets)
Vite produces a dist/ folder with static files. index.html is the entry point. JavaScript and CSS are bundled, minified, and given hashed filenames for cache busting. This is a static site that can be served by any web server or CDN. No Node.js runtime needed.
Next.js Build Output
npm run build
# Output: .next/
#   server/ (server-side code)
#   static/ (client-side assets)
#   standalone/ (if configured, self-contained server)
Next.js produces both server-side and client-side code. If you use Server Components, API routes, or server actions, you need a Node.js server in production. If your Next.js app is purely static, you can use next export to generate static files, but most Next.js apps in 2026 require a server.
Understanding the Difference Between Static and Server-Side
This distinction determines your hosting options. Static sites (React with Vite, plain HTML/CSS/JS) can be hosted anywhere: Vercel, Netlify, Cloudflare Pages, an S3 bucket with CloudFront, or any web server. Server-side applications (Next.js with SSR, Express APIs, Node.js backends) need a server runtime: Vercel serverless functions, AWS Lambda, a VPS with Node.js, or a Docker container.
Choosing the wrong hosting for your build type is one of the most common deployment mistakes I see from developers. Deploying a Next.js app with server components to a static hosting service like Cloudflare Pages results in broken server features, missing API routes, and server actions that silently fail. Deploying a static React app to a full VPS with PM2 and Nginx is wasting $12/month on infrastructure you do not need when Cloudflare Pages would host it for free with better global performance.
Environment Variables and the Mistake Every New Developer Makes
Environment variables are configuration values that change between environments: API keys, database URLs, feature flags. They must never be hardcoded in your source code and must never be committed to Git.
Client-Side vs Server-Side Environment Variables
The most dangerous mistake with environment variables is exposing server-side secrets to the client. In Next.js, any environment variable prefixed with NEXT_PUBLIC_ is bundled into the client JavaScript and visible to anyone who opens DevTools. Variables without the prefix are only available on the server.
# .env.local

# SERVER ONLY - never sent to browser
DATABASE_URL=postgresql://user:password@host:5432/db
STRIPE_SECRET_KEY=sk_live_abc123
API_SECRET=my-secret-key

# CLIENT-SAFE - bundled into browser JS
NEXT_PUBLIC_STRIPE_PUBLISHABLE_KEY=pk_live_xyz789
NEXT_PUBLIC_API_URL=https://api.example.com
// Server component or API route - safe
const db = new PrismaClient({
    datasources: { db: { url: process.env.DATABASE_URL } },
});

// Client component - only NEXT_PUBLIC_ variables work here
const apiUrl = process.env.NEXT_PUBLIC_API_URL;
// process.env.DATABASE_URL is undefined here (correctly)
In Vite-based projects, the prefix is VITE_ instead of NEXT_PUBLIC_. The same rule applies: anything with the prefix is bundled into client code and visible to users.
Setting Environment Variables in Production
Every hosting platform has its own way of setting environment variables. On Vercel, you set them in the dashboard under Settings > Environment Variables. On a VPS, you create a .env file on the server or set them in your systemd service configuration. In Docker, you pass them with docker run -e or through a docker-compose.yml file.
# docker-compose.yml
services:
  app:
    image: my-app:latest
    environment:
      - DATABASE_URL=postgresql://user:password@db:5432/mydb
      - NODE_ENV=production
    ports:
      - "3000:3000"
Never store production secrets in your repository. Use your hosting platform's secret management, or a tool like AWS Secrets Manager or HashiCorp Vault for larger deployments.
Deploying Static JavaScript Applications to Vercel and Cloudflare Pages
For static and Next.js applications, Vercel and Cloudflare Pages are the simplest deployment options in 2026.
Vercel Deployment in 3 Steps
# 1. Install Vercel CLI
npm install -g vercel

# 2. Login
vercel login

# 3. Deploy
vercel --prod
That is the entire deployment. Vercel detects your framework (React, Next.js, Svelte, etc.), runs the build, and deploys to a global CDN with HTTPS. For most JavaScript applications, this is the fastest path from localhost to production.
Connect your GitHub repository and Vercel deploys automatically on every push to main. Pull requests get preview deployments with unique URLs so you can test changes before merging.
Cloudflare Pages for Static Sites
Cloudflare Pages is free for unlimited bandwidth and provides a global CDN. For static React/Vite applications, it is the most cost-effective option.
# 1. Install Wrangler CLI
npm install -g wrangler

# 2. Login
wrangler login

# 3. Deploy
npx wrangler pages deploy dist
Cloudflare Pages does not support Node.js server-side rendering natively (Cloudflare Workers can, but with limitations). For pure static sites, it is excellent. For Next.js with server components, use Vercel or a server-based deployment.
When Free Tier Is Not Enough
Vercel's free tier includes 100GB bandwidth and serverless function execution limits. For personal projects and small applications, this is more than enough. For applications with real traffic (10,000+ daily users), you will need the Pro plan ($20/month) or a self-hosted solution.
The decision point: if your application makes money, pay for hosting. If it is a portfolio project, free tier is fine. Do not spend weeks setting up a complex AWS deployment for a project that gets 10 visitors per day.
Deploying Node.js Applications to a VPS
For backend applications, APIs, and full-stack apps that need more control than serverless provides, a Virtual Private Server (VPS) is the standard choice. DigitalOcean, Linode (Akamai), and Hetzner offer VPS instances starting at $4-6/month.
Setting Up a VPS From Scratch
# SSH into your server
ssh root@your-server-ip

# Update packages
apt update && apt upgrade -y

# Install Node.js via nvm
curl -o- https://raw.githubusercontent.com/nvm-sh/nvm/v0.39.0/install.sh | bash
source ~/.bashrc
nvm install 22
nvm use 22

# Install PM2 for process management
npm install -g pm2

# Clone your application
git clone https://github.com/your-username/your-app.git
cd your-app
npm install
npm run build

# Start with PM2
pm2 start npm --name "my-app" -- start
pm2 save
pm2 startup
PM2 keeps your application running after crashes, automatically restarts it if it uses too much memory, clusters it across multiple CPU cores, and starts it automatically when the server reboots. Without PM2 (or a similar process manager like forever or systemd), your Node.js application stops the moment your SSH session ends or the process crashes for any reason.
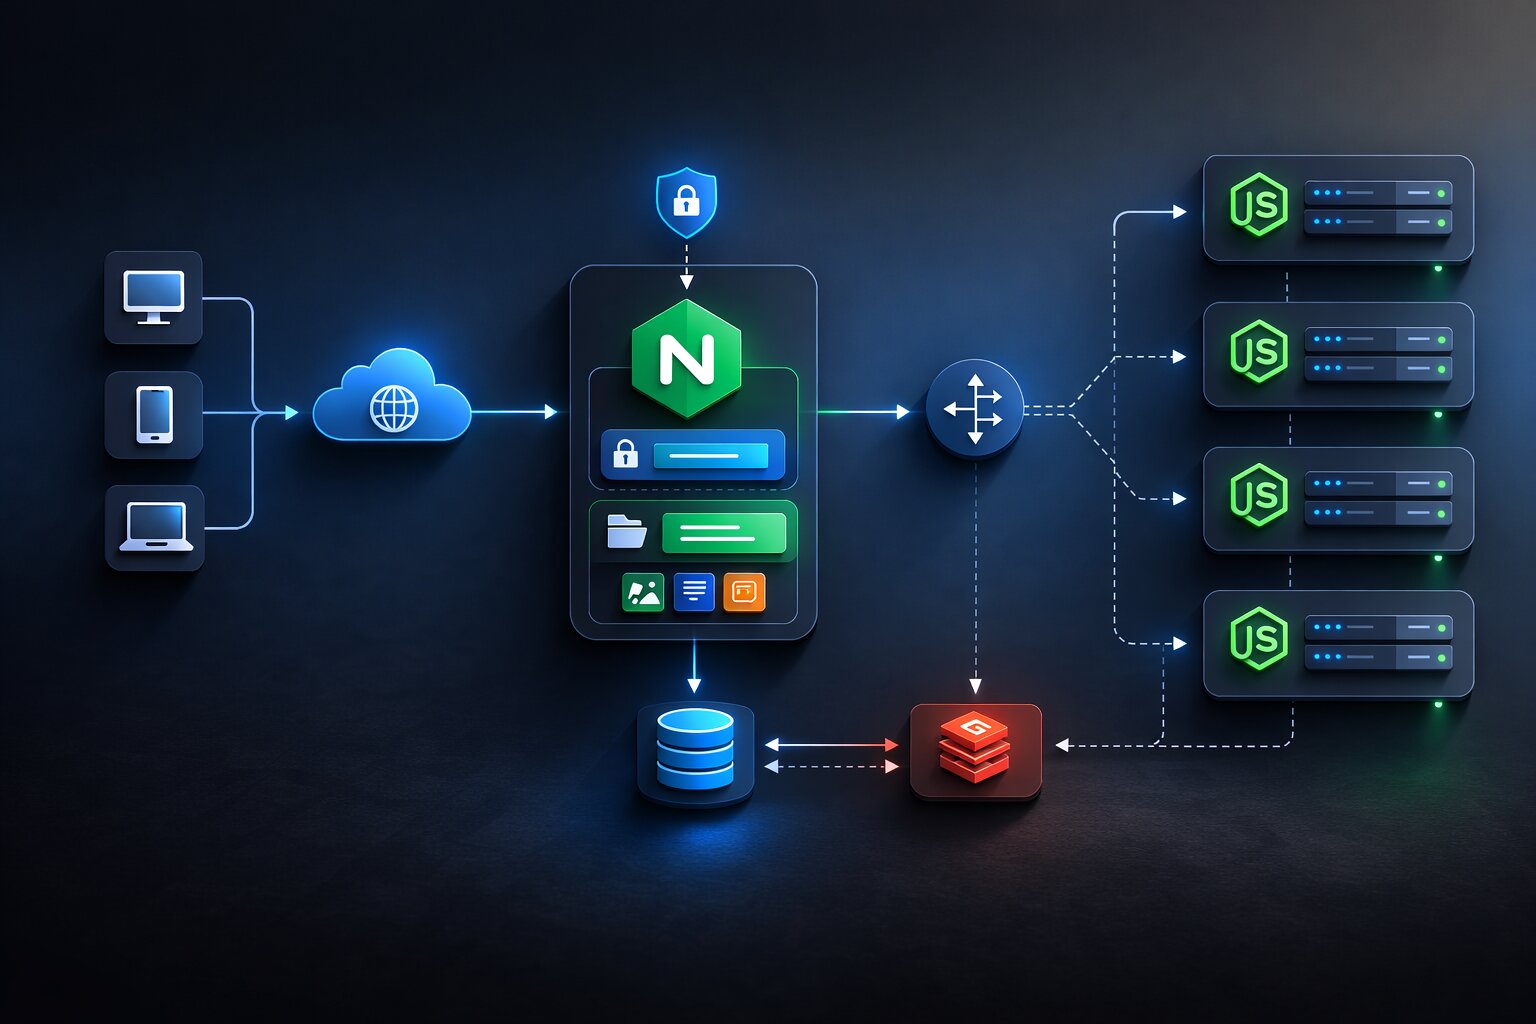
Setting Up Nginx as a Reverse Proxy
Your Node.js application runs on port 3000 (or whatever you configure). Users should not access port 3000 directly. Nginx sits in front of your application, handles HTTPS, serves static files, and proxies requests to Node.js.
# /etc/nginx/sites-available/my-app
server {
    listen 80;
    server_name yourdomain.com www.yourdomain.com;

    location / {
        proxy_pass http://localhost:3000;
        proxy_http_version 1.1;
        proxy_set_header Upgrade $http_upgrade;
        proxy_set_header Connection 'upgrade';
        proxy_set_header Host $host;
        proxy_set_header X-Real-IP $remote_addr;
        proxy_set_header X-Forwarded-For $proxy_add_x_forwarded_for;
        proxy_cache_bypass $http_upgrade;
    }
}
# Enable the site
ln -s /etc/nginx/sites-available/my-app /etc/nginx/sites-enabled/
nginx -t
systemctl restart nginx
For JavaScript developers who want a deeper understanding of Nginx configuration and why it matters for senior roles, Nginx knowledge is one of the most undervalued infrastructure skills in the JavaScript ecosystem.
Adding HTTPS With Let's Encrypt
HTTPS is not optional in 2026. Browsers show security warnings on HTTP sites. Google penalizes HTTP sites in search rankings. Let's Encrypt provides free TLS certificates.
# Install Certbot
apt install certbot python3-certbot-nginx -y

# Generate certificate (automatically configures Nginx)
certbot --nginx -d yourdomain.com -d www.yourdomain.com

# Certificates auto-renew via a cron job
certbot renew --dry-run
One command. Certbot generates the certificate, configures Nginx to use HTTPS with proper TLS settings, sets up HTTP to HTTPS redirect, and creates a cron job for automatic renewal every 60 days. Your site is now served over HTTPS with zero cost and zero ongoing maintenance.
Docker Deployment for JavaScript Applications
Docker packages your application with its dependencies into a container that runs identically everywhere. No more "works on my machine" problems.
Writing a Production Dockerfile
# Build stage
FROM node:22-alpine AS builder
WORKDIR /app
COPY package*.json ./
RUN npm ci --production=false
COPY . .
RUN npm run build

# Production stage
FROM node:22-alpine
WORKDIR /app
COPY --from=builder /app/dist ./dist
COPY --from=builder /app/node_modules ./node_modules
COPY --from=builder /app/package.json ./

ENV NODE_ENV=production
EXPOSE 3000

CMD ["node", "dist/server.js"]
This multi-stage build keeps the final image small and secure. The build stage installs all dependencies (including devDependencies needed for compilation) and builds the application. The production stage copies only the built files and production node_modules. The result is a Docker image that is typically 100-200MB instead of 500MB+ that you would get from a single-stage build that includes source code, devDependencies, and build artifacts.
# Build the image
docker build -t my-app:latest .

# Run the container
docker run -d -p 3000:3000 --env-file .env.production my-app:latest
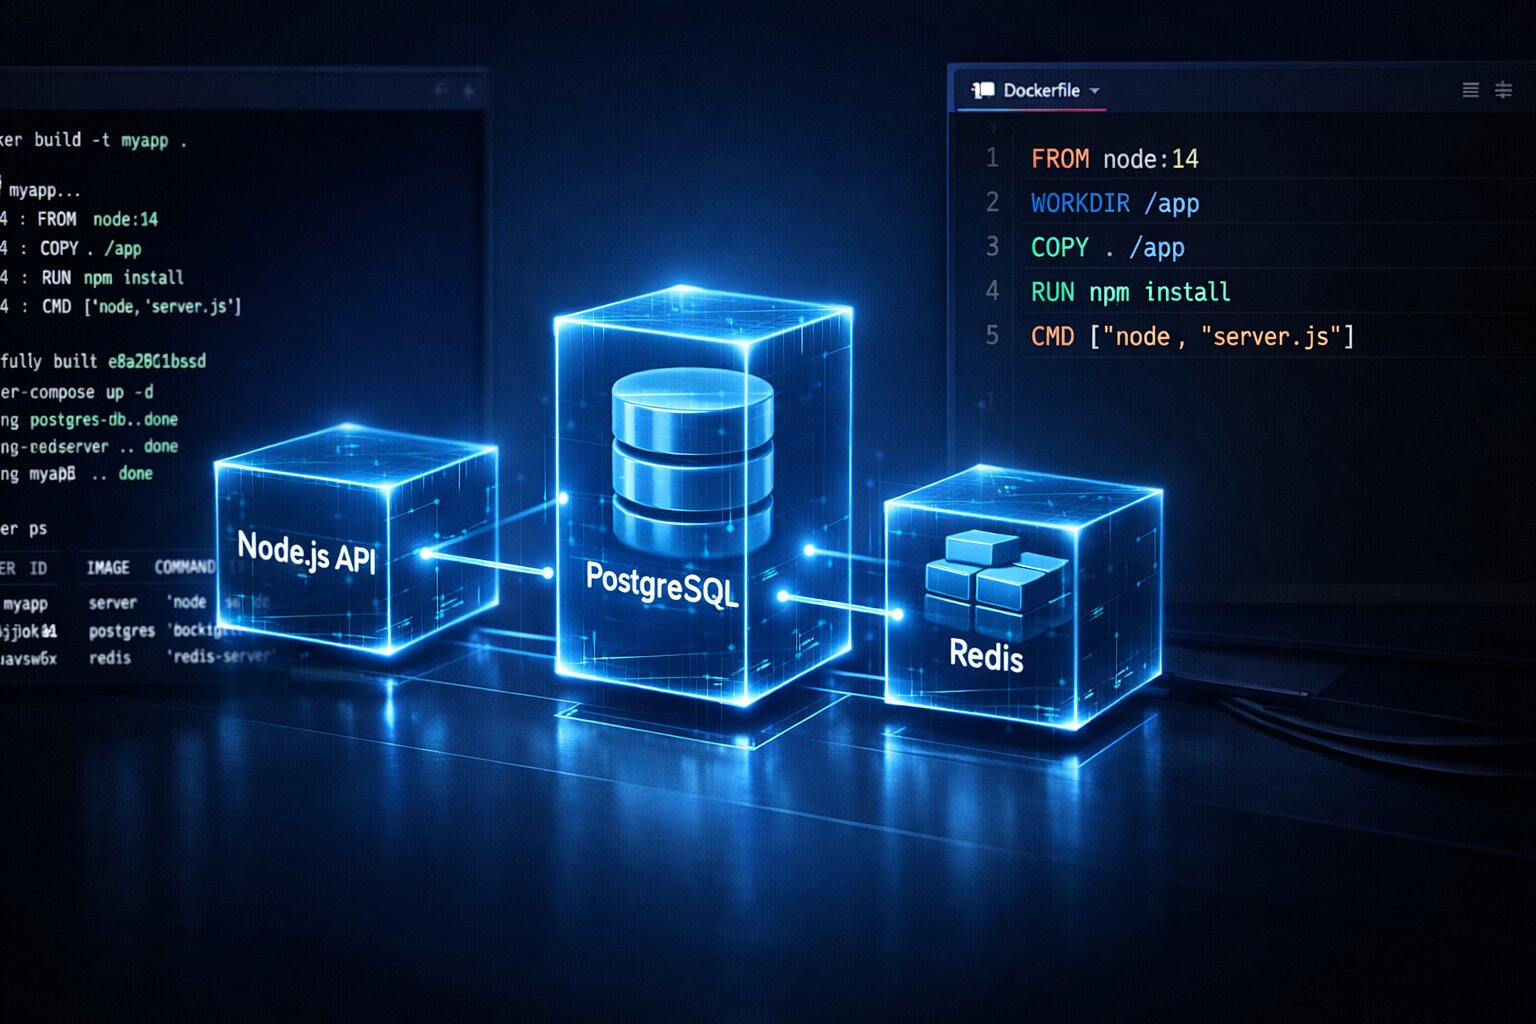
Docker Compose for Multi-Service Applications
Most production applications need more than just the application server. A typical setup includes the app, a database, and possibly Redis for caching.
# docker-compose.yml
version: '3.8'
services:
  app:
    build: .
    ports:
      - "3000:3000"
    environment:
      - DATABASE_URL=postgresql://postgres:password@db:5432/myapp
      - REDIS_URL=redis://redis:6379
    depends_on:
      - db
      - redis

  db:
    image: postgres:16-alpine
    environment:
      - POSTGRES_PASSWORD=password
      - POSTGRES_DB=myapp
    volumes:
      - postgres_data:/var/lib/postgresql/data

  redis:
    image: redis:7-alpine

volumes:
  postgres_data:
# Start everything
docker compose up -d

# View logs
docker compose logs -f app

# Stop everything
docker compose down
For developers building Docker skills that directly impact career opportunities, knowing how to containerize and deploy JavaScript applications is increasingly a requirement for senior positions.
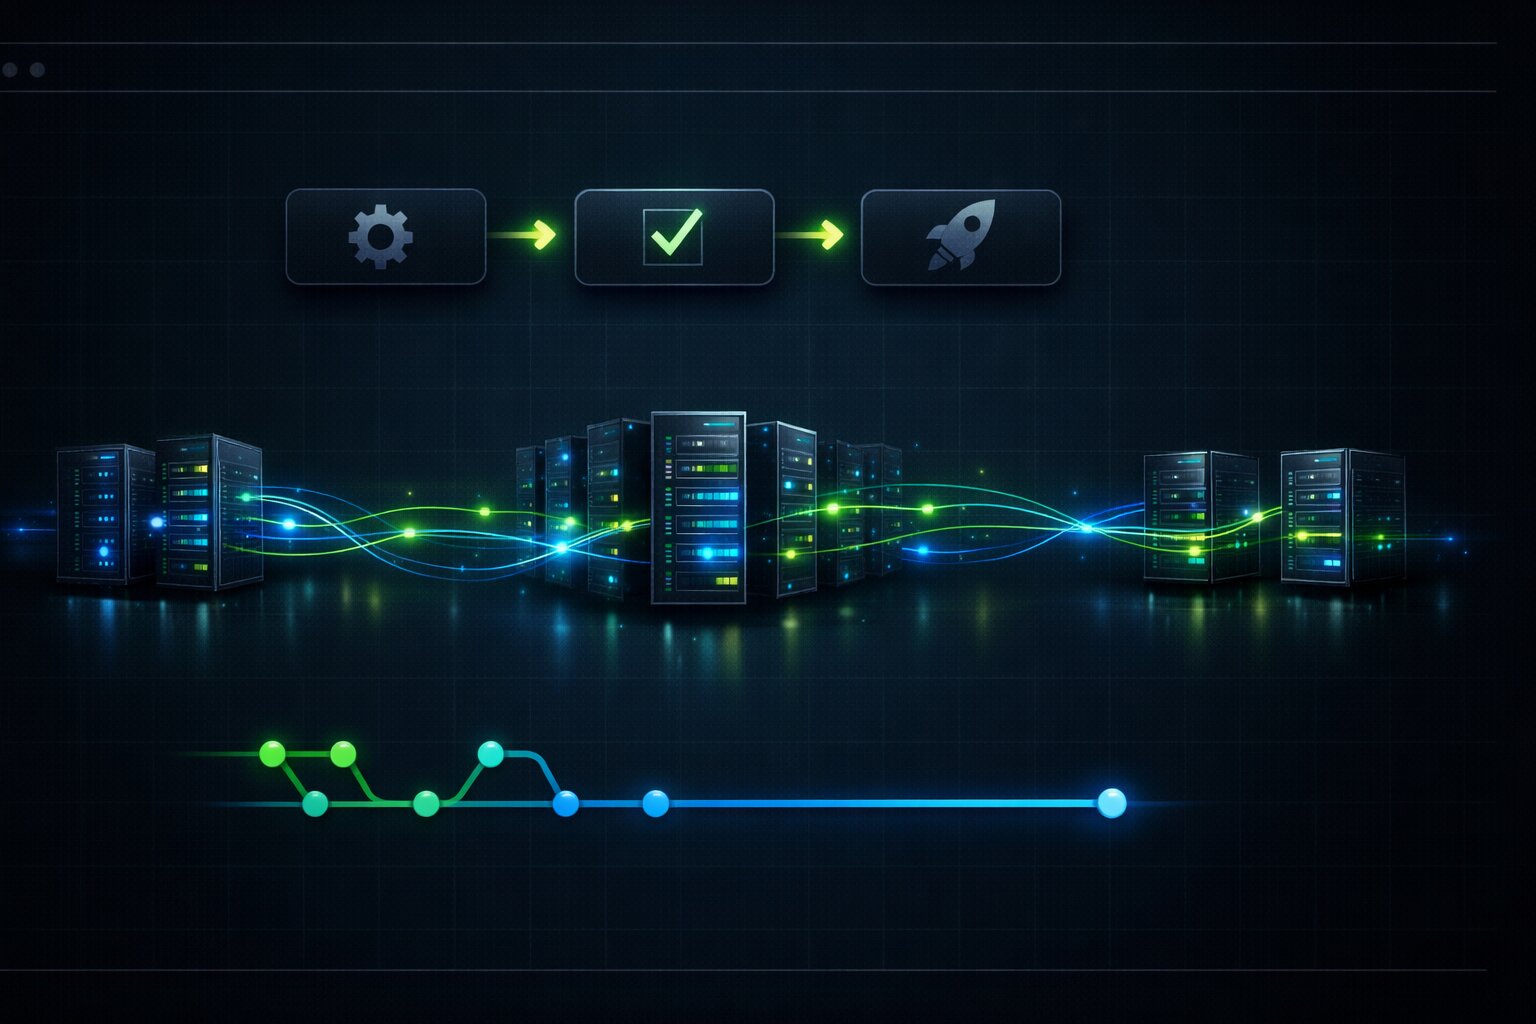
CI/CD Pipelines for Automated JavaScript Deployment
Manual deployment (SSH into server, git pull, npm install, restart) works for side projects. For anything with users, you need automated deployment through CI/CD.
GitHub Actions for Automatic Deployment
# .github/workflows/deploy.yml
name: Deploy

on:
  push:
    branches: [main]

jobs:
  test:
    runs-on: ubuntu-latest
    steps:
      - uses: actions/checkout@v4
      - uses: actions/setup-node@v4
        with:
          node-version: 22
      - run: npm ci
      - run: npm run lint
      - run: npm test

  deploy:
    needs: test
    runs-on: ubuntu-latest
    steps:
      - uses: actions/checkout@v4
      - uses: actions/setup-node@v4
        with:
          node-version: 22
      - run: npm ci
      - run: npm run build
      - name: Deploy to server
        uses: appleboy/ssh-action@v1
        with:
          host: ${{ secrets.SERVER_HOST }}
          username: ${{ secrets.SERVER_USER }}
          key: ${{ secrets.SSH_PRIVATE_KEY }}
          script: |
            cd /var/www/my-app
            git pull origin main
            npm ci --production
            npm run build
            pm2 restart my-app
This pipeline runs on every push to main. It first runs tests and linting. If they pass, it SSHs into the server and deploys. If tests fail, nothing deploys. This prevents broken code from reaching production.
Zero-Downtime Deployment
The GitHub Actions example above has a problem: during npm run build and pm2 restart, the application is briefly unavailable. For applications with users, you need zero-downtime deployment.
PM2 supports this with the --update-env and reload commands:
# In your deploy script, use reload instead of restart
pm2 reload my-app --update-env
pm2 reload starts new instances of the application before stopping old ones. Once the new instances are ready to accept requests, the old ones are shut down. Users never experience downtime.
For Docker deployments, use rolling updates:
# Build new image
docker build -t my-app:v2 .

# Update the service with zero downtime
docker compose up -d --no-deps --build app
DNS Configuration and Domain Setup
Your application is running on a server with an IP address like 164.92.105.47. Users need to access it via yourdomain.com. This requires DNS configuration.
Setting Up DNS Records
At your domain registrar (Namecheap, Cloudflare, Google Domains), add these DNS records:
Type A, Name @, Value your server IP. This maps yourdomain.com to your server.
Type A, Name www, Value your server IP. This maps www.yourdomain.com to your server.
If using Vercel or Cloudflare Pages, they provide their own nameservers or CNAME records. Follow their documentation for DNS setup. Vercel requires adding a CNAME record pointing to cname.vercel-dns.com for custom domains.
DNS propagation takes 5 minutes to 48 hours depending on TTL settings and global DNS cache refresh rates. During this time, some users might see the old DNS records while others see the new ones. This is normal and not something you can control. Setting a low TTL (300 seconds) before making DNS changes speeds up propagation because caches expire faster.
Using Cloudflare as a DNS Proxy
Cloudflare's DNS proxy hides your server IP, provides DDoS protection, and adds a free CDN layer. Instead of pointing your domain directly to your server IP, you point it to Cloudflare's nameservers and Cloudflare proxies requests to your server.
# Cloudflare DNS settings
Type: A, Name: @, Value: 164.92.105.47, Proxy: ON
Type: A, Name: www, Value: 164.92.105.47, Proxy: ON
With the proxy enabled, users connect to Cloudflare's edge servers. Cloudflare handles SSL termination, caches static assets, and forwards dynamic requests to your origin server. This reduces load on your server and improves response times for users worldwide. The free plan includes unlimited bandwidth, basic DDoS protection, and shared SSL certificates.
Production Logging That Actually Helps When Things Break
Console.log is not production logging. When your application serves 10,000 requests per day, you need structured logs that you can search, filter, and alert on.
Structured Logging With Pino
import pino from 'pino';

const logger = pino({
    level: process.env.LOG_LEVEL || 'info',
    transport: process.env.NODE_ENV === 'development'
        ? { target: 'pino-pretty' }
        : undefined,
});

// Structured log with context
logger.info({ userId: user.id, action: 'login', ip: req.ip }, 'User logged in');

// Error log with stack trace
logger.error({ err: error, orderId: order.id }, 'Payment processing failed');
Pino outputs JSON logs in production. JSON logs can be parsed by log aggregation services like Datadog, Grafana Loki, or AWS CloudWatch. A line like {"level":30,"time":1711234567890,"userId":"abc123","action":"login","msg":"User logged in"} can be searched by userId, filtered by action, and graphed over time.
What to Log and What Not to Log
Log every incoming request (method, URL, status code, response time). Log every error with context (what was the user doing, what data was involved, what was the stack trace). Log every external API call (which service, how long it took, did it succeed).
Do not log passwords, API keys, credit card numbers, or personal data. This is not just good practice. It is a legal requirement under GDPR and similar regulations. A log file containing user passwords is a data breach waiting to happen.
// WRONG: logging sensitive data
logger.info({ email: user.email, password: user.password }, 'Login attempt');

// RIGHT: logging safely
logger.info({ email: user.email, success: true }, 'Login attempt');
Production Monitoring and Error Tracking
Deploying code is not the end. You need to know when things break in production before your users tell you.
Application Error Tracking With Sentry
// Install: npm install @sentry/node
import * as Sentry from '@sentry/node';

Sentry.init({
    dsn: process.env.SENTRY_DSN,
    environment: process.env.NODE_ENV,
    tracesSampleRate: 0.1, // 10% of transactions for performance monitoring
});

// Express error handler
app.use(Sentry.Handlers.errorHandler());
Sentry captures every unhandled error in production, groups them by type and frequency, and shows you the full stack trace, the user's browser and operating system, the HTTP request that caused it, and how many users are affected by each error. The free tier supports 5,000 errors per month, which is more than enough for small to medium applications.
Uptime Monitoring
Use a service like UptimeRobot (free for 50 monitors) or Better Stack to ping your application every minute. If it does not respond, you get an email or Slack notification. This is the simplest form of monitoring and takes 2 minutes to set up.
Health Check Endpoints
app.get('/health', (req, res) => {
    const health = {
        status: 'ok',
        timestamp: new Date().toISOString(),
        uptime: process.uptime(),
        memory: process.memoryUsage(),
    };

    // Check database connection
    try {
        await db.$queryRaw`SELECT 1`;
        health.database = 'connected';
    } catch {
        health.database = 'disconnected';
        health.status = 'degraded';
        res.status(503);
    }

    res.json(health);
});
Point your uptime monitor at /health instead of /. This checks not just that the server responds but that the database is connected and the application is functional.
How to Roll Back a Failed Deployment
Deployments fail. A bug slips through tests. A database migration breaks something. An environment variable is misconfigured. You need to be able to roll back in minutes, not hours.
Git-Based Rollback
# On the server: revert to the previous commit
git log --oneline -5  # find the previous good commit
git checkout abc1234   # checkout the known good commit
npm ci --production
npm run build
pm2 reload my-app
Docker-Based Rollback
# Tag every deployment with a version
docker build -t my-app:v15 .
docker tag my-app:v15 my-app:latest

# If v15 is broken, roll back to v14
docker stop my-app-container
docker run -d --name my-app-container my-app:v14
The advantage of Docker is that previous images are still on the server. Rolling back is starting a container from the old image. No rebuild, no npm install, no waiting. Just start the old image and the application is back in seconds.
Vercel Rollback
Vercel keeps every deployment accessible at a unique URL. In the Vercel dashboard, find the last working deployment and click "Promote to Production." Rollback takes less than 30 seconds.
Always test your rollback process before you need it. The worst time to learn how to roll back is during a production incident at 3 AM.
Database Migrations in Production Deployment
The most dangerous part of any deployment is database migrations. Code changes can be rolled back instantly. Schema changes cannot. If you add a column, deploy new code, and then need to roll back the code, the old code does not know about the new column. If you remove a column and the old code references it, the rollback crashes.
Safe Migration Strategy
The rule for safe database migrations: separate schema changes from code changes. Deploy them in two steps, not one.
Step one: deploy a migration that adds the new column but do not use it in code yet. The old code ignores the new column. The new column exists but is unused.
-- Migration 1: add column (backward compatible)
ALTER TABLE users ADD COLUMN display_name VARCHAR(255);
Step two: deploy code that uses the new column. Now both the schema and the code are aligned.
// New code that uses display_name
const user = await db.users.findUnique({ where: { id } });
return user.display_name || user.name;
If you need to roll back the code, the old code simply ignores the display_name column. No crash. No data loss. This two-step approach takes more deployments but eliminates the risk of migration-related outages.
Running Migrations Automatically in CI/CD
# In your GitHub Actions deploy step
- name: Run migrations
  run: npx prisma migrate deploy
  env:
    DATABASE_URL: ${{ secrets.DATABASE_URL }}

- name: Deploy application
  run: |
    # Only deploy app after migrations succeed
    ssh user@server "cd /app && git pull && npm ci && npm run build && pm2 reload app"
Migrations run before the application deploys. If a migration fails, the deployment stops. The application continues running with the old code and the old schema. No partial state.
Hosting Cost Comparison for JavaScript Applications in 2026
Hosting costs vary dramatically depending on your choice. Here is what real applications cost at different scales.
For Portfolio Projects and Side Projects (0-100 daily users)
Vercel free tier costs $0/month with 100GB bandwidth. Cloudflare Pages costs $0/month with unlimited bandwidth. A DigitalOcean droplet costs $4/month for 512MB RAM. For applications with no traffic or minimal traffic, free hosting is the correct choice. Do not spend money on hosting before you have users.
For Small Production Applications (100-10,000 daily users)
Vercel Pro costs $20/month with 1TB bandwidth. A DigitalOcean droplet with 2GB RAM costs $12/month. Railway costs $5-20/month depending on usage. AWS Lightsail costs $5-20/month. At this scale, you need more bandwidth, more memory, and better uptime guarantees.
For Growing Applications (10,000+ daily users)
Vercel Enterprise or AWS/GCP becomes necessary. A typical stack on AWS (EC2 + RDS + ElastiCache + CloudFront) costs $100-500/month depending on traffic and database size. At this scale, you need auto-scaling, managed databases, and CDN distribution.
The mistake most developers make is over-engineering infrastructure for small applications. A $4/month VPS handles thousands of daily users comfortably. Do not set up Kubernetes for a blog with 50 readers.
Edge Deployment and Why It Matters in 2026
Edge deployment runs your code on servers close to your users instead of in a single region. Cloudflare Workers, Vercel Edge Functions, and Deno Deploy all offer edge computing for JavaScript.
// Vercel Edge Function
export const config = {
    runtime: 'edge',
};

export default function handler(request: Request) {
    const country = request.headers.get('x-vercel-ip-country');

    return new Response(
        JSON.stringify({ message: `Hello from the edge, user in ${country}` }),
        { headers: { 'content-type': 'application/json' } }
    );
}
Edge functions execute in under 50ms because the code runs on a server physically close to the user, often within the same country or city. Traditional server deployments in a single region (like US East) add 100-300ms of network latency for users in Asia, Europe, or Australia.
The limitation of edge deployment is that you cannot use full Node.js APIs. Edge runtimes use a stripped-down JavaScript environment based on the Web API standard. Libraries that depend on Node.js-specific features (like fs, net, or native C++ addons) do not work on the edge. Database connections from the edge require connection pooling services like PlanetScale or Neon because edge functions cannot maintain persistent database connections.
For most JavaScript applications in 2026, a hybrid approach works best: serve static assets from a CDN, run latency-sensitive operations (authentication, API routing) on the edge, and run heavy computation and database operations on a traditional server.
The 10 Most Common Deployment Failures and How to Fix Each One
After watching hundreds of deployments through jsgurujobs projects and community interactions, these are the failures I see most often.
The first and most common: MODULE_NOT_FOUND in production but works locally. This happens because a dependency is in devDependencies instead of dependencies in package.json, and production installs skip devDependencies. Fix: move the package to dependencies or check if it should only be used during build.
The second: environment variables undefined in production. The .env file exists locally but was never created on the server. Or the variable name has a typo. Or the variable is not prefixed with NEXT_PUBLIC_ for client-side access. Fix: verify every environment variable exists in the production environment before deploying.
The third: port already in use. Another process is using port 3000. Fix: use lsof -i :3000 to find the process and kill it, or configure your application to use a different port via the PORT environment variable.
The fourth: CORS errors in production but not in development. The API and frontend are on different domains in production. Fix: configure CORS headers on the API server to allow requests from the frontend domain.
The fifth: HTTPS mixed content. The page loads over HTTPS but makes API calls over HTTP. Browsers block this. Fix: ensure all API URLs use https:// in production configuration.
The sixth: application crashes after running for hours. Memory leak or unhandled promise rejection. Fix: use PM2 with --max-memory-restart 500M to automatically restart when memory exceeds a threshold, and add unhandled rejection handlers.
The seventh: build succeeds but pages show blank white screen. A JavaScript error prevents React from rendering. Fix: check the browser console for errors, usually a missing environment variable or a failed API call during initial render.
The eighth: deployment succeeds but old version still showing. Browser cache or CDN cache serving stale files. Fix: bust the cache by using hashed filenames (Vite does this automatically) and purge the CDN cache after deployment.
The ninth: database connection timeout. The server cannot reach the database. Fix: verify database URL, security groups or firewall rules, and that the database is running. Common when the database and server are in different networks.
The tenth: file permissions error on the server. Node.js cannot read or write files because of Linux permission settings. Fix: ensure the application runs as the correct user and that file permissions allow read/write where needed.
The Deployment Checklist That Prevents 90% of Production Issues
Before every deployment to production, verify these items. Not some of them. All of them.
Verify that NODE_ENV is set to production. Many libraries behave differently in development vs production. React includes extra warnings in development that slow down the application. Express shows detailed error messages in development that expose internals to users.
Verify that all environment variables are set in the production environment. A missing DATABASE_URL does not cause a build error. It causes a runtime crash when the first database query runs.
Verify that the build succeeds locally before pushing. Run npm run build on your machine. If it fails locally, it will fail in CI/CD.
Verify that tests pass. Run npm test locally. Automated tests exist to catch bugs before they reach users.
Verify that HTTPS is configured. Check that your certificate is valid and not expired. Certbot auto-renews, but verify that the cron job is running.
Verify that error tracking is active. Make sure Sentry (or your error tracking tool) is receiving events from the production environment.
Every experienced developer has a story about a deployment that broke production because of a missing environment variable or a failed build that nobody checked. The checklist takes 2 minutes. The production incident takes 2 hours. For developers building CI/CD pipelines that prevent these issues automatically, the checklist becomes encoded in the pipeline itself.
Deployment is not a single skill. It is a chain of decisions: what to build, where to host, how to configure, when to deploy, and how to recover when things go wrong. Every link in the chain matters. The developer who understands the full chain ships products that reach real users. The developer who only understands the first link (writing code) builds features that live on localhost forever and never generate revenue, never get user feedback, and never grow into real products.
In 2026, the market pays for shipping, not for building. A developer who can build a beautiful React dashboard but cannot deploy it is less valuable to a company than a developer who builds a simpler dashboard and has it running in production with monitoring, error tracking, and automated deployments by the end of the week. The first developer needs help to ship. The second developer ships independently. Companies pay a premium for independence.
The good news is that deployment is not rocket science. It is a learnable, repeatable process. Deploy one application from scratch, document every step, and the second deployment takes half the time. By the fifth deployment, you do it without thinking. The knowledge compounds and every application you ship makes the next one easier to ship. Start with Vercel for the simplest path. Graduate to a VPS with Docker when you need more control. Add CI/CD when manual deployment becomes tedious. Add monitoring when you have real users. Each step builds on the previous one and each step makes you more valuable as a developer.
If you want to see which JavaScript roles require deployment skills and what they pay, I track this data weekly at jsgurujobs.com.
FAQ
What is the easiest way to deploy a JavaScript application in 2026?
Vercel or Cloudflare Pages for static and Next.js applications. Connect your GitHub repo, push to main, and it deploys automatically with HTTPS, a CDN, and preview deployments. For backend Node.js applications, a VPS with PM2 and Nginx is the simplest server-based option starting at $4-6/month.
Do I need Docker for JavaScript deployment?
Not for every project. If you deploy to Vercel or Cloudflare Pages, Docker is unnecessary. Docker becomes valuable when you need consistent environments across development and production, when you run multiple services (app + database + cache), or when you deploy to AWS, GCP, or your own servers. Learn Docker when you outgrow simple hosting.
How do I handle environment variables in production?
Never commit secrets to Git. Use your hosting platform's environment variable settings (Vercel dashboard, Docker --env-file, VPS .env file). Remember that client-side variables (NEXT_PUBLIC_ or VITE_) are visible to users in the browser. Only put public configuration in client-side variables.
How do I do zero-downtime deployment?
Use pm2 reload instead of pm2 restart for Node.js applications. For Docker, use rolling updates with docker compose up -d --no-deps --build. For Vercel, every deployment is automatically zero-downtime because new deployments are served only after they are fully built and ready.
Share this article